This post is free for all. If you enjoyed what you’ve read, feel free to pass it along to friends.
Pan de muerto (bread of the dead) is an annual bake for panaderías and Mexican panaderas in Mexico and the diaspora. The arrival of the loaves in Mexican bakeries everywhere ushers in Día de los Muertos; occurring on the 1st and 2nd of November, the holiday is a celebration and remembrance of the dead by their living. People create ofrendas, memorial altars, that are meant to be a welcoming, a tangible prayer to our loved one’s spirit gone to another realm.
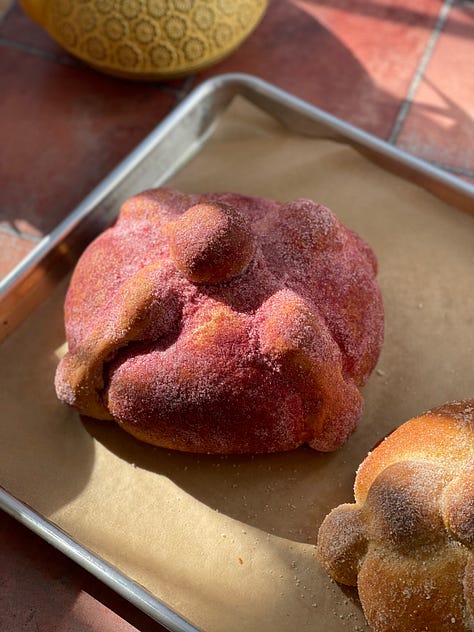
Ofrendas are filled with various pan dulce, shot glasses of tequila or your loved one’s favorite drink, candles, decorated sugar skulls called calaveras, and marigold flowers known as cempazúchitl. Anything that reminds you of your loved one who has passed gets placed on the ofrenda, including pan de muerto. This bread, meant to resemble a skull and bones, is an enriched dough, much like the concha, flavored classically with anise seed, orange blossom water and coated with sugar after baking. You can get really creative with flavoring the sugar, which is what we will be doing.
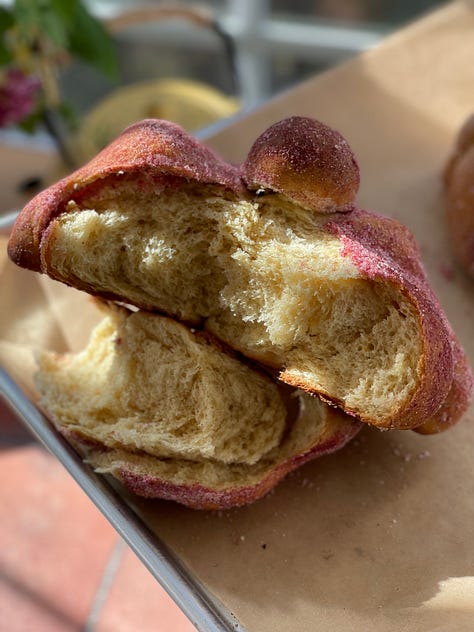
This recipe that I use for the bakery makes two loaves, one for your ofrenda and one to eat or give away to another. Don’t feel intimidated by the length of the recipe or by the quick preferment — a preferment is just a portion of the dough prepared in advance. Mixing a bit of the dough to bloom before adding it to the remaining ingredients gives the final product a complex flavor, a softer crumb and an extended shelf life, although this last part may not matter much to you unless you also run a micro bakery.


Add Flavor to Your sugar
I’ve written a few recipes that utilize flavored sugars, like for these besos and in these sugar cookies. Adding a flavoring to sugar—whether it be ground freeze dried fruit, alcohol (!), vanilla bean paste, spices, or just simply some citrus zest—is one of my favorite ways to add even more flavor to whatever I’m baking. Most of us are familiar with cinnamon sugar; rolling snickerdoodles in the sugar is a good way to get even more cinnamon flavor in the cookie. I like to think of flavored sugar as baking jewerly, especially on bakes like cookies or pan de muerto.
If you are using orange blossom water in your pan de muerto dough (which is traditional, although my recipe uses orange zest) you can add some of the water to granulated sugar, let it dry out for a few hours and then grind it down to basically superfine sugar. The same is true for alcohol such as rum, tequila, Baileys’ Irish Cream, which I recently made to sprinkle over chocolate conchas. Mariela Camacho of the Austin, TX bakery, Comradre Panadería uses a mezcal and orange zest sugar to flavor some of her pan de muerto. MijaBakesLLC, a chef in Burbank, CA makes a pan de muerto croissant covered in black sugar made from burnt blue corn tortillas for a “mixture of ash and sugar. Symbolizing the circle of life and death.”
Use flavored sugar in various baked goods as a 1:1 swap with granulated sugar— cakes, pan de muerto, for sprinkling over cookies and conchas after baking. Any leftover sugar you have from these recipes will hopefully be a welcome new addition to your pantry.
At Heart Panadería Pan de Muerto
Yield: two 8-inch loaves
Proof time: 2 hours for the first rise; 1 hour - 90 minutes for the final rise
Bake time: 25 minutes
Preferment
9 grams (about 1 tablespoon) active dry yeast
110 grams (½ cup) milk, warmed to 105F
½ tablespoon granulated sugar, honey, or brown sugar
35 grams (about ¼ cup) bread flour
Dough
350 grams (about 2 ¾ cups) bread flour
150 grams (about 1 ¼ cups) whole wheat flour
50 grams (¼ cup) granulated sugar
4 cold large eggs
Zest from 1 large navel orange
½ tablespoon kosher salt
230 grams (2 sticks) unsalted butter, softened
Make the preferment:
In the bowl of a stand mixer, add the active dry yeast, warmed milk, sugar, and the bread flour. Mix with a fork or whisk and cover with a clean kitchen towel. Let the preferment get foamy and nearly double in size, about 25 minutes, then proceed with the recipe.
Make the dough:
To the stand mixer bowl, add the flours, sugar, eggs, and salt. Make sure the salt goes in last and doesn’t come in contact with the yeast as it could kill it. Mix on medium speed until the dough pulls away from the sides of the bowl, about 5-7 minutes.
Turn the mixer off and let the dough rest while you prepare the butter: slice the softened butter into tablespoon pieces. Reserve the butter wrapper to grease the mixer bowl later. Start the mixer again on medium speed and begin adding the butter a few pieces at a time. At first the butter will cling to and smear on the sides of the bowl in a buttery mess and you’ll wonder why you trusted me — just keep mixing. Once all the butter has been added, let the dough mix on medium speed for a good 15-20 minutes.
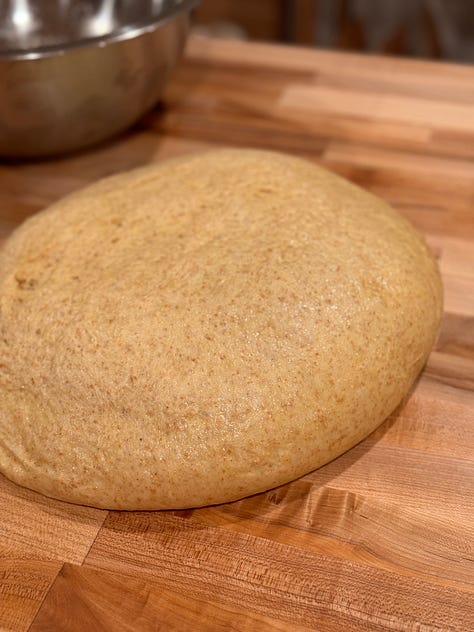
After mixing for about 15-20 minutes, the dough should be smooth and clearing the sides of the bowl. At this point the dough should pass the windowpane test.
Remove the dough from the bowl and to your clean, un-floured work surface. Knead the dough by hand just for an additional minute or so. Using the reserved butter wrapper, grease the stand mixer bowl and transfer dough back into the bowl to proof. Cover with plastic wrap, then drape a clean kitchen towel over the bowl. Let dough proof in a warm environment until doubled in size, about 2 hours.
Once doubled in size, punch down the dough, cover again with plastic then transfer to your fridge where it can begin a long, slow ferment for 12-24 hours.
Shape the dough and bones:
Once 12-24 hours have passed, remove the dough from the fridge and place once again in a warm environment to come back to room temperature, about 30 minutes. Line a large baking sheet with parchment paper. In a small bowl, make an egg wash of 1 large egg and a little water; set aside.
Using a bench scraper or similar tool, portion off a piece of dough that weighs about 250 grams. Divide that portion in half; set aside and cover with a clean kitchen towel.
Divide the remaining dough into two pieces, about 420 grams each. Shape each dough piece into a round loaf by gently cupping both hands on either side while rolling on your work surface to create tension. Place the dough halves on the prepared baking sheet and gently press down on each to flatten into roughly 6-inch rounds. Cover with a clean kitchen towel while you make the bones.
Divide the remaining two portions of dough into thirds, for six pieces in total. Roll two pieces of dough into small, tight balls and place on the baking sheet.
Roll one piece of dough into a 6-inch rope; spread your pointer, middle, and ring finger on the dough while pressing down to roll the rope. The idea is to make three deep indentations in the dough rope for the “bones”. Repeat with the remaining pieces of dough.
Brush the tops of the dough loaves with the egg wash. Place one of the dough bones on the surface of one of the loaves, pressing down to secure. Make sure the portion of the bone with the middle indentation is in the center of the loaf. Place a second bone over the first bone on the same loaf now, making a cross. Again, make sure the indentations meet in the center of the loaf. Repeat with the remaining dough pieces until both loaves have their bones.
Cover the loaves with a kitchen towel and let rise in a warm environment once again until puffy and doubled in size, about 1 hour - 90 minutes.
Bake the pan de muerto:
Preheat oven to 350F when the loaves are nearly done proofing. Dab a bit of water on the center of each loaf now and place the remaining two dough balls on top, firmly pressing down to attach. These are your “skulls”.
Bake pan de muerto for 25 minutes to start. After 25 minutes, flip the baking sheet front to back and continue baking for an additional 15 minutes or so, or until the pan de muertos are a beautiful warm brown color, all over. If you have an instant read thermometer, insert it underneath one of the loaves; it should read 190F for a perfect bake.
Let pan de muerto cool on the baking sheet for about 15 minutes, then transfer to a cooling rack.
While the pan de muerto cools, melt a stick of butter. Brush the melted butter on a portion of the cooled pan de muerto, then cover that portion with your flavored sugar. Work with portions of the bread at a time so the sugar will stick before the butter has a chance to dry. Repeat with the second pan de muerto loaf.
Serve pan de muerto with your favorite warm beverage. Store pan de muerto by covering with plastic wrap at room temperature; it will last for up to 4 days. Place a loaf on your ofrenda in remembrance of and gratitude for your ancestors.
Spiced Rum and Orange Sugar
1 cup granulated sugar
Zest from 2 large Navel oranges
1/2 teaspoon ground cinnamon
1/2 teaspoon ground nutmeg
1 tablespoon dark rum
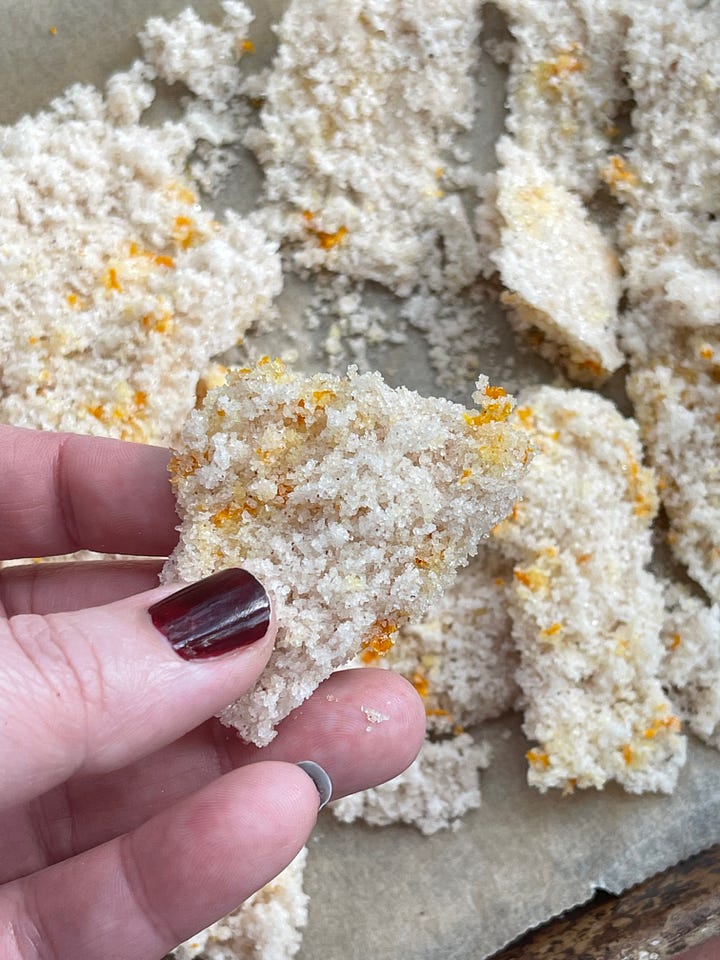
On a small baking sheet lined with parchment, add the granulated sugar, orange zest, spices, and rum or your alcohol of choosing. Stir to combine everything together, then let the mixture dry out over a few hours. The mixture will harden and clump as the alcohol dries.
Once the sugar has absorbed all the liquid and has hardened, grind it down using a food processor until the sugar is very fine. You’ll notice flecks of orange zest and spices throughout. Alternatively, you can crush the sugar mixture by placing it in a large freezer storage bag and pound it using a rolling pin. This is an arm workout, fyi. Store the sugar in an airtight container at room temperature.
Freeze Dried Fruit Sugar
2 ounces (4 tablespoons) freeze dried fruit
1 cup granulated sugar
Add the whole pieces of freeze dried fruit to a food processor. Grind or crush the fruit until very fine and powdery. A note that there will be a cloud of fruit powder when you lift the food processor lid; I just make sure to remember to turn my face away. You can sift out any larger, stubborn pieces of fruit. (Save them though for adding to decoration on your cakes, cookies, or by adding whole to cookie dough.) Add the granulated sugar and blitz the mixture until both fruit and sugar are fine and well combined. Freeze dried fruit sugar will clump even if stored in an airtight container, but I find that it’s easy enough to just stir with a fork to get it back to a fine consistency.


This looks amazing!!
Thanks so much for this recipe!
I made the dough yesterday but being a bit “attention deficit” I had to read a number of times to work out where the orange zest went in the dough because I had this orange that I had sent my partner to the shop for sitting on the bench 🤣 and the dough was made! I re-read the intro and realised I should have done the zest/sugar thing at the beginning. So I pulled the half risen dough out of its resting place and kneaded the orange zest into it 🤣.
🤞🏼🤞🏼🤞🏼
Today I will shape and bake and coat the loaves as per your instructions, and then I am going to take to work for my young Mexican workmate tomorrow. I bake conchas for her sometimes after she told me about them so I think she will be chuffed! Even if it is not technically perfect, it will be the best this anglo-Australian can muster up 😁
So thanks again!!